



First-time setup turns a new account into a usable workspace: confirm your identity, add organization context, choose where to work, and invite the people who should join you.
1. Confirm your profile
Enter the name you want teammates to see and select the region where you are based.
2. Add organization information
Select your team size, industry, and how you heard about Evane. These details describe your organization and do not assign your workspace role.
3. Choose or create a workspace
If you already belong to a workspace or have a pending invitation, Evane can show the workspace chooser. You can enter a workspace, accept an invitation, or continue to create a new one.
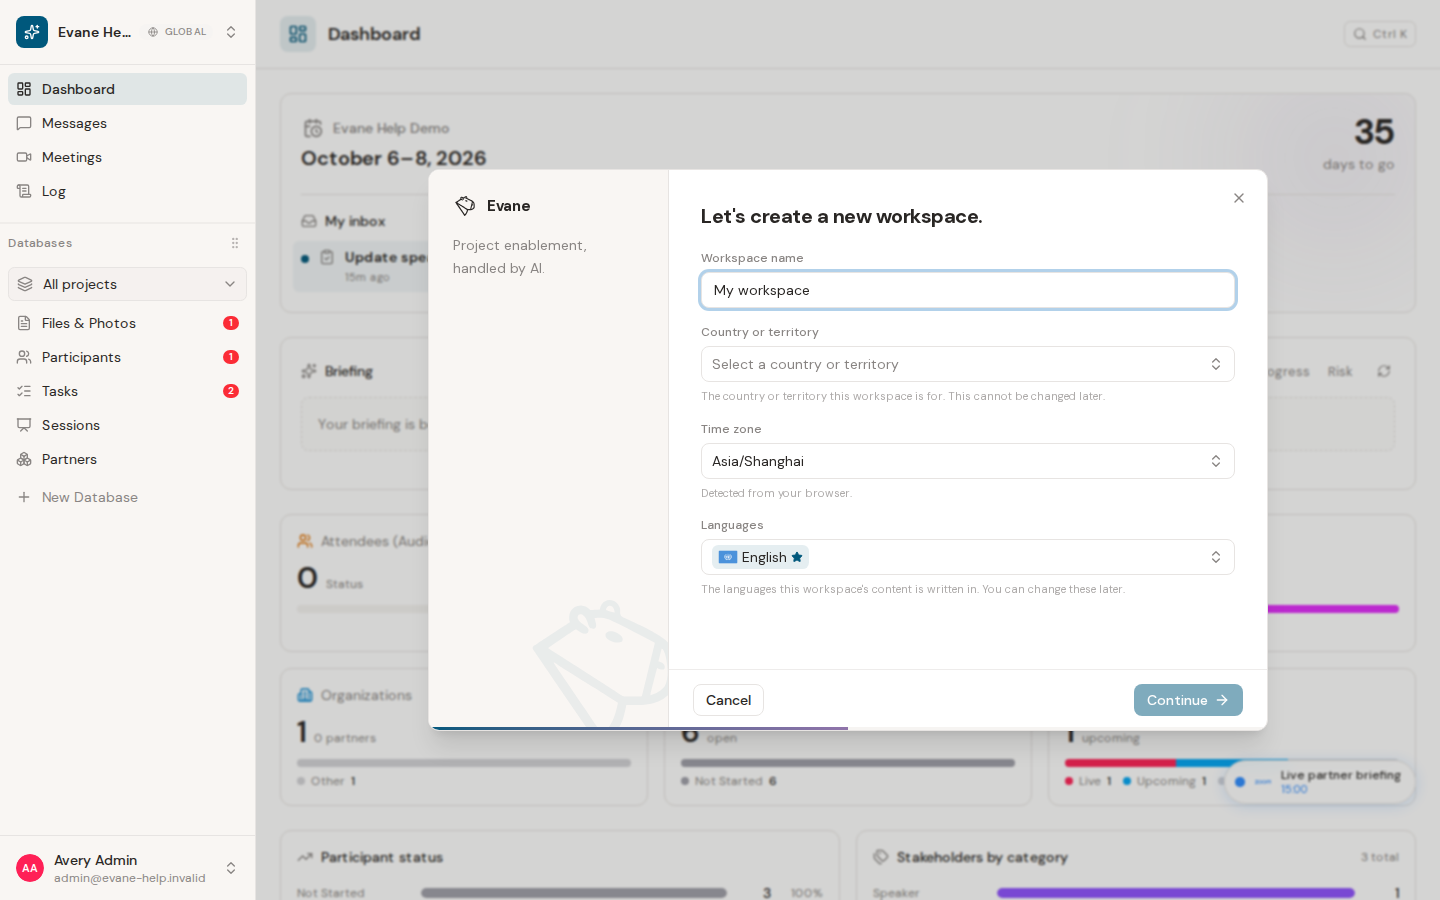
When you create a workspace, provide:
- Workspace name: the name members will see in the workspace switcher.
- Country or territory: the place the workspace is for. The server uses this choice to select the data center, which is shown read-only and cannot be changed after creation.
- Time zone: initially detected from your browser and used to display workspace dates and times.
- Content languages: the languages used by workspace content, including one primary language. These language settings can be changed later.
4. Invite teammates
Add each teammate's email address and choose a role:
- Admin: manages the workspace, members, and administrative settings.
- Editor: can create and edit workspace content.
- Viewer: has read-only access to the content their membership permits.
You can add several invitations before finishing. Invalid or duplicate email entries are not added to the list.
5. Finish setup
Evane creates the workspace if needed, sends the queued invitations, and saves your onboarding profile. Select Enter Evane on the completion screen to open the workspace.
The setup writes are finalized together near the end of the flow. If creating the workspace fails, Evane shows an error and lets you try again. If only some invitations fail, the workspace can still be created and Evane reports the unsuccessful invitations.